I have a young child in my home. As she gets older (she’s turning 9 years old this month) she has more and more exposure to the internet. For any parent, this is a challenge; I need to keep her safe from malicious content on the internet. I have used Ubiquiti network devices on my LAN for many years and have had no major complaints with their products. However, one thing that really isn’t very clear in their UniFi Network web interface, used to manage all my devices, is that you can manage internet use for a specific client. And not many people know this feature. Mainly, I believe, is because Ubiquiti is geared toward small office to enterprise level networks where there is an expectation that an experienced Network Admin knows their products and has the expertise to manage the network.
So that my daughter can do homework and play Minecraft, she uses an old Lenovo Thinkpad of mine. To control what she does and sees on the internet on that laptop, I have two controls in place. One that I have had for quite some time are the DNS options for safe browsing. For some time I had an account and was using OpenDNS (now owned by Cisco) to filter malicious internet content. However, for personal reasons, I decided it was time to try something else. I discovered that Cloudflare has their own free DNS services for home use that can filter Malware and Adult content using 1.1.1.3 and 1.0.0.3. More information here. I have since updated those IPs in my DHCP options for my network within UniFi Network. Testing the access of malicious sites, from a test virtual machine that I can trash, was a success, the content was blocked.
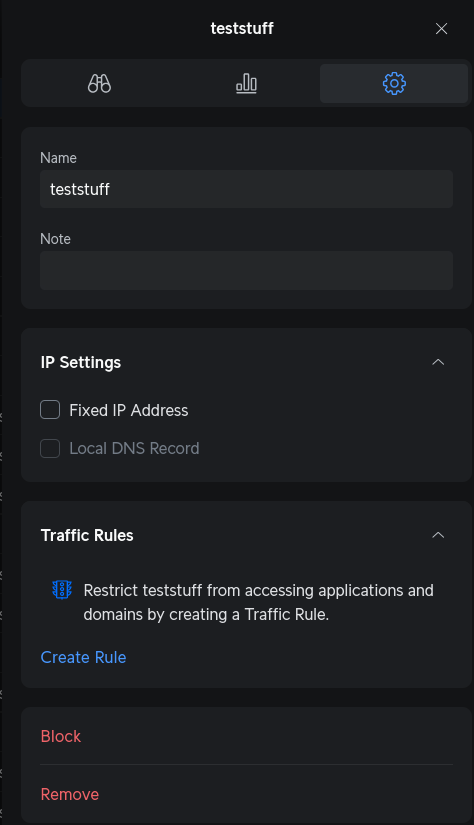
The second control is the ability to add additional filtering, or just sever internet access completely when needed. This second control was not completely in plain view within UniFi Network. To configure filtering, the steps can be completed in two different ways. One method is to just go straight to the Security section on UniFi Network and create a rule. The other option is by selecting the client in the Client Devices section, which opens a window for configuration as seen in the below screenshot.

Then select the Settings gear and Create Rule under the Traffic Rules section, like below:
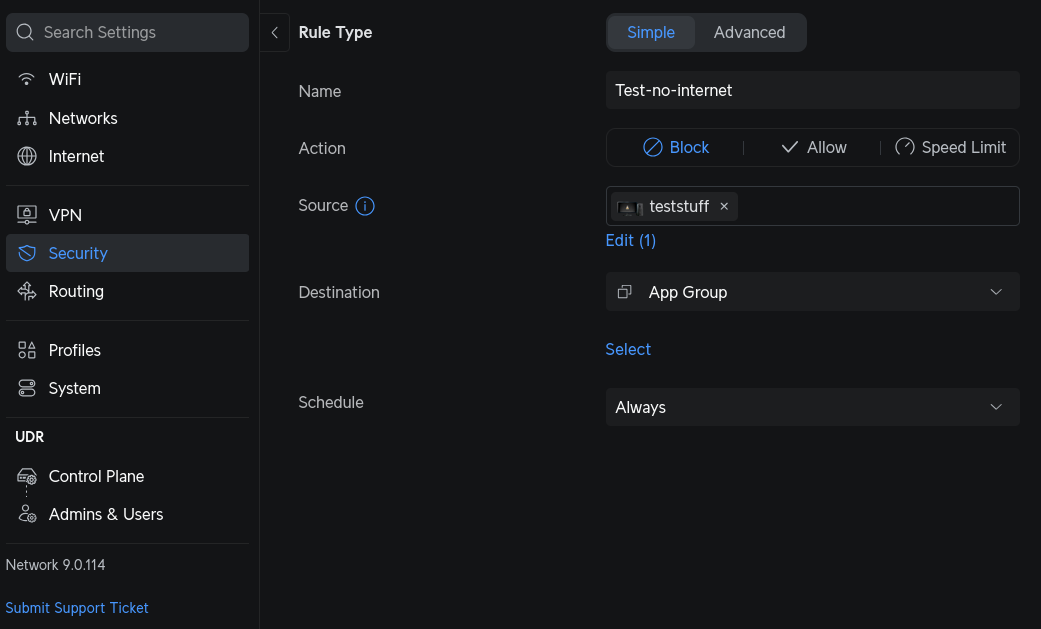
Once you select Create Rule, this will open the Security section with some basic areas prefilled. As seen below, for my purpose of completely blocking all internet access, I selected App Group from Destination section, then immediately under I clicked the Select and chose All App Groups. And for Schedule, I left it at Always. However, there is flexibility here if anyone wants to select other time options (Every Day, One-Time Only, or even a Custom time).
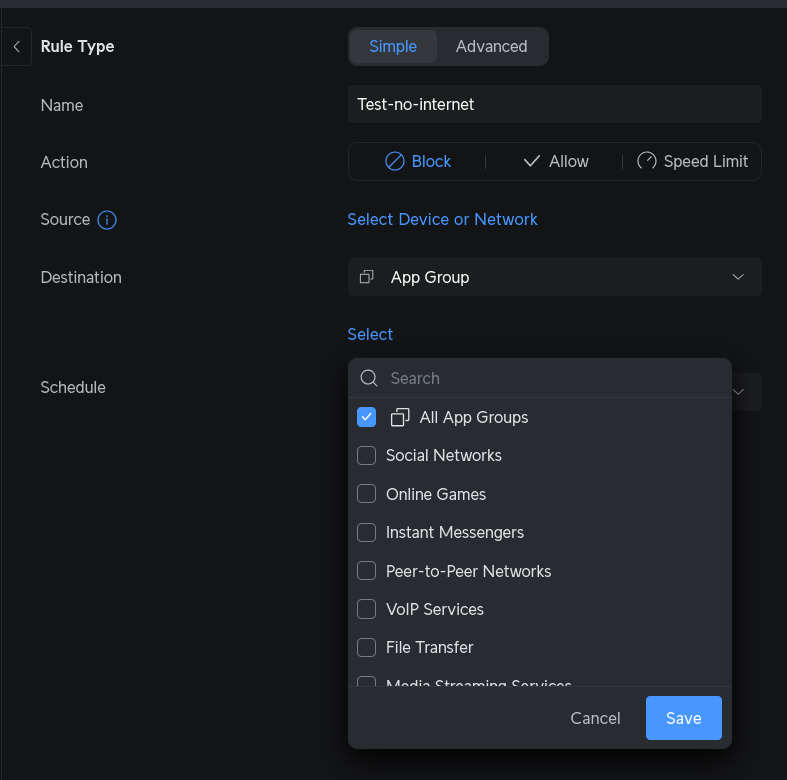
If you plan on setting this up, you will notice under the App Group that you can pick and choose (e.g. Social Networks, Online Gaming, Media Streaming Services, etc.) without having to select All App Groups. One thing to note also is that if you ever need to pause this rule, you have the option of selecting Manage, click the checkbox of the rule and select Pause.
If you have any questions or comments, please feel free to send me an email noted in my About page.